Information
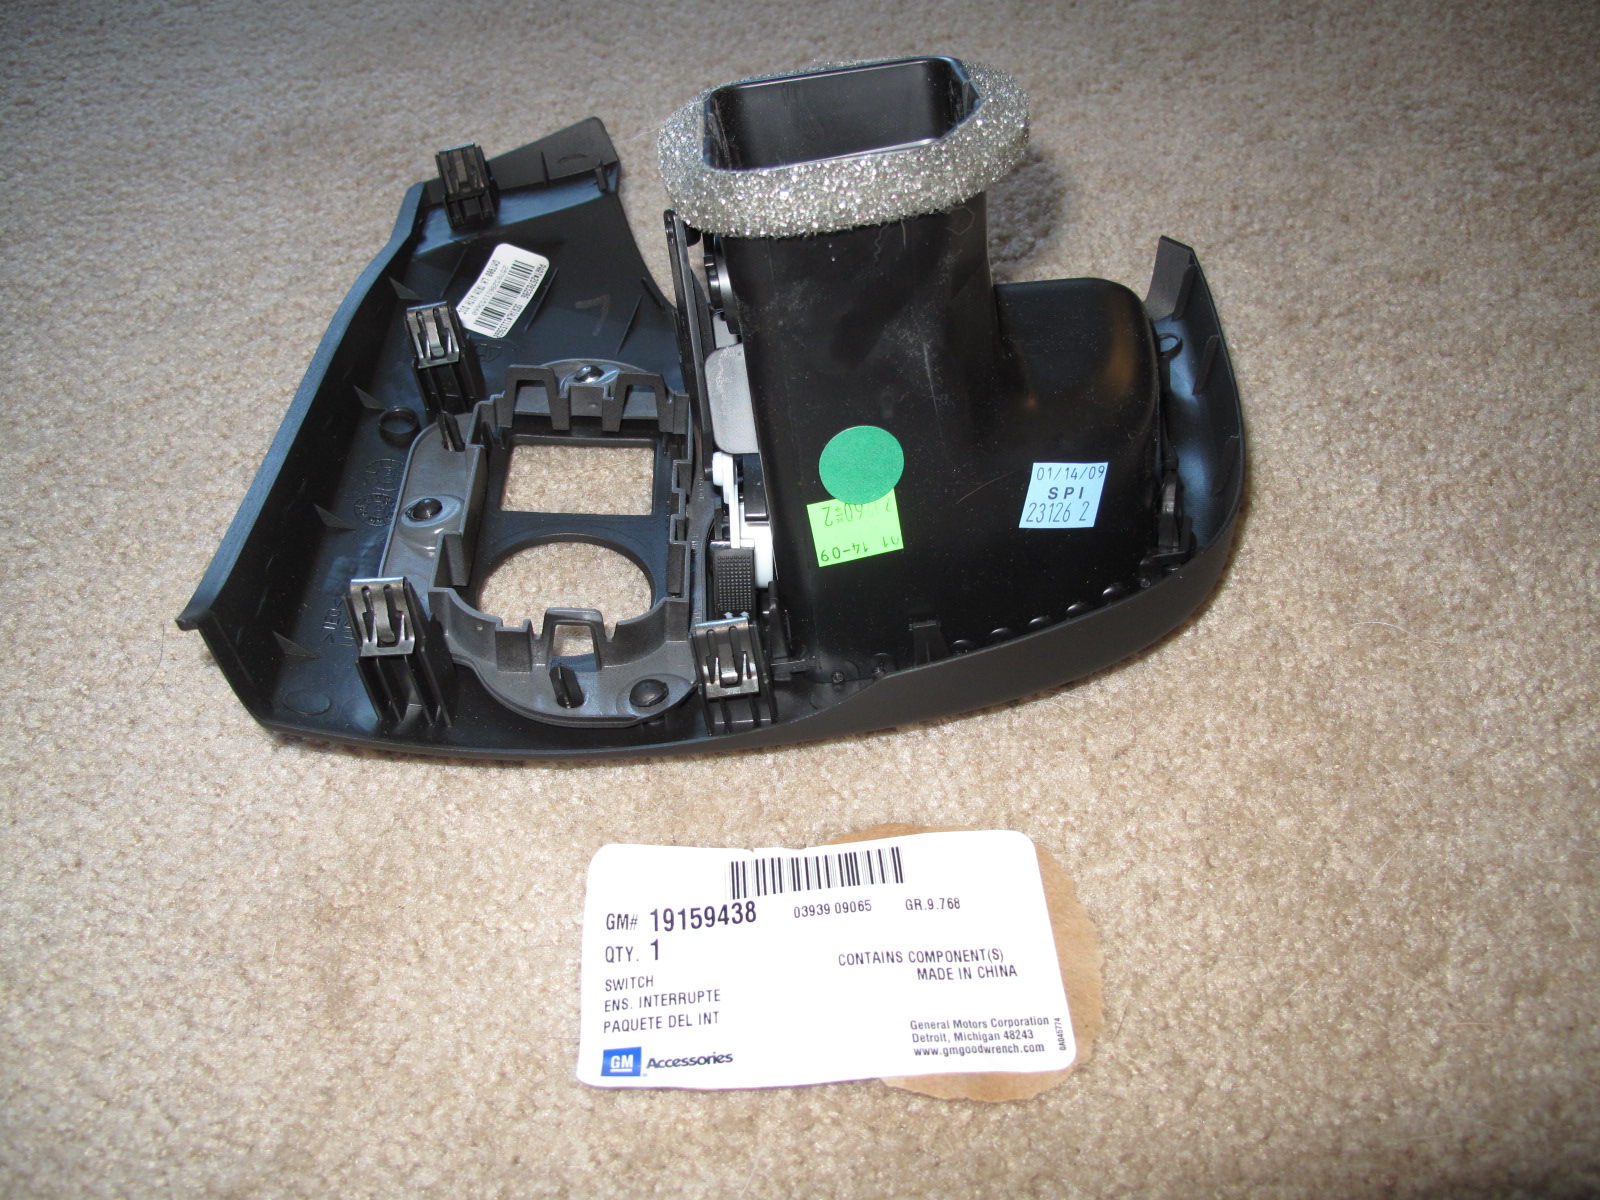
The part number you're looking for is: GM 19159438
You can pick it up at your local dealership for somewhere around $85. They're still making a profit at $85, what it costs them is quite a few dollars less. It's definitely worth $85. I don't know if it's worth the ~$110 some dealerships want though. I'd probably buy online then.
Little is needed except for about 15 minutes of your time. In fact, you don't really need any tools either if you don't pull the whole dash apart like you're supposed to if following GM's directions. A nylon pic will make removal more easy if you don't have strong fingers (and fingernails).
So far, all the trucks I have checked for the DIC button harness have had it including a 1500 W/T. You can check to see if this harness is available to your vehicle by removing your trim panel and checking to see that the plug that goes into the DIC buttons is merely plugged into an empty socket on the back of your trim panel.
You can click on the images to see a larger version.
Driver Information Center Buttons
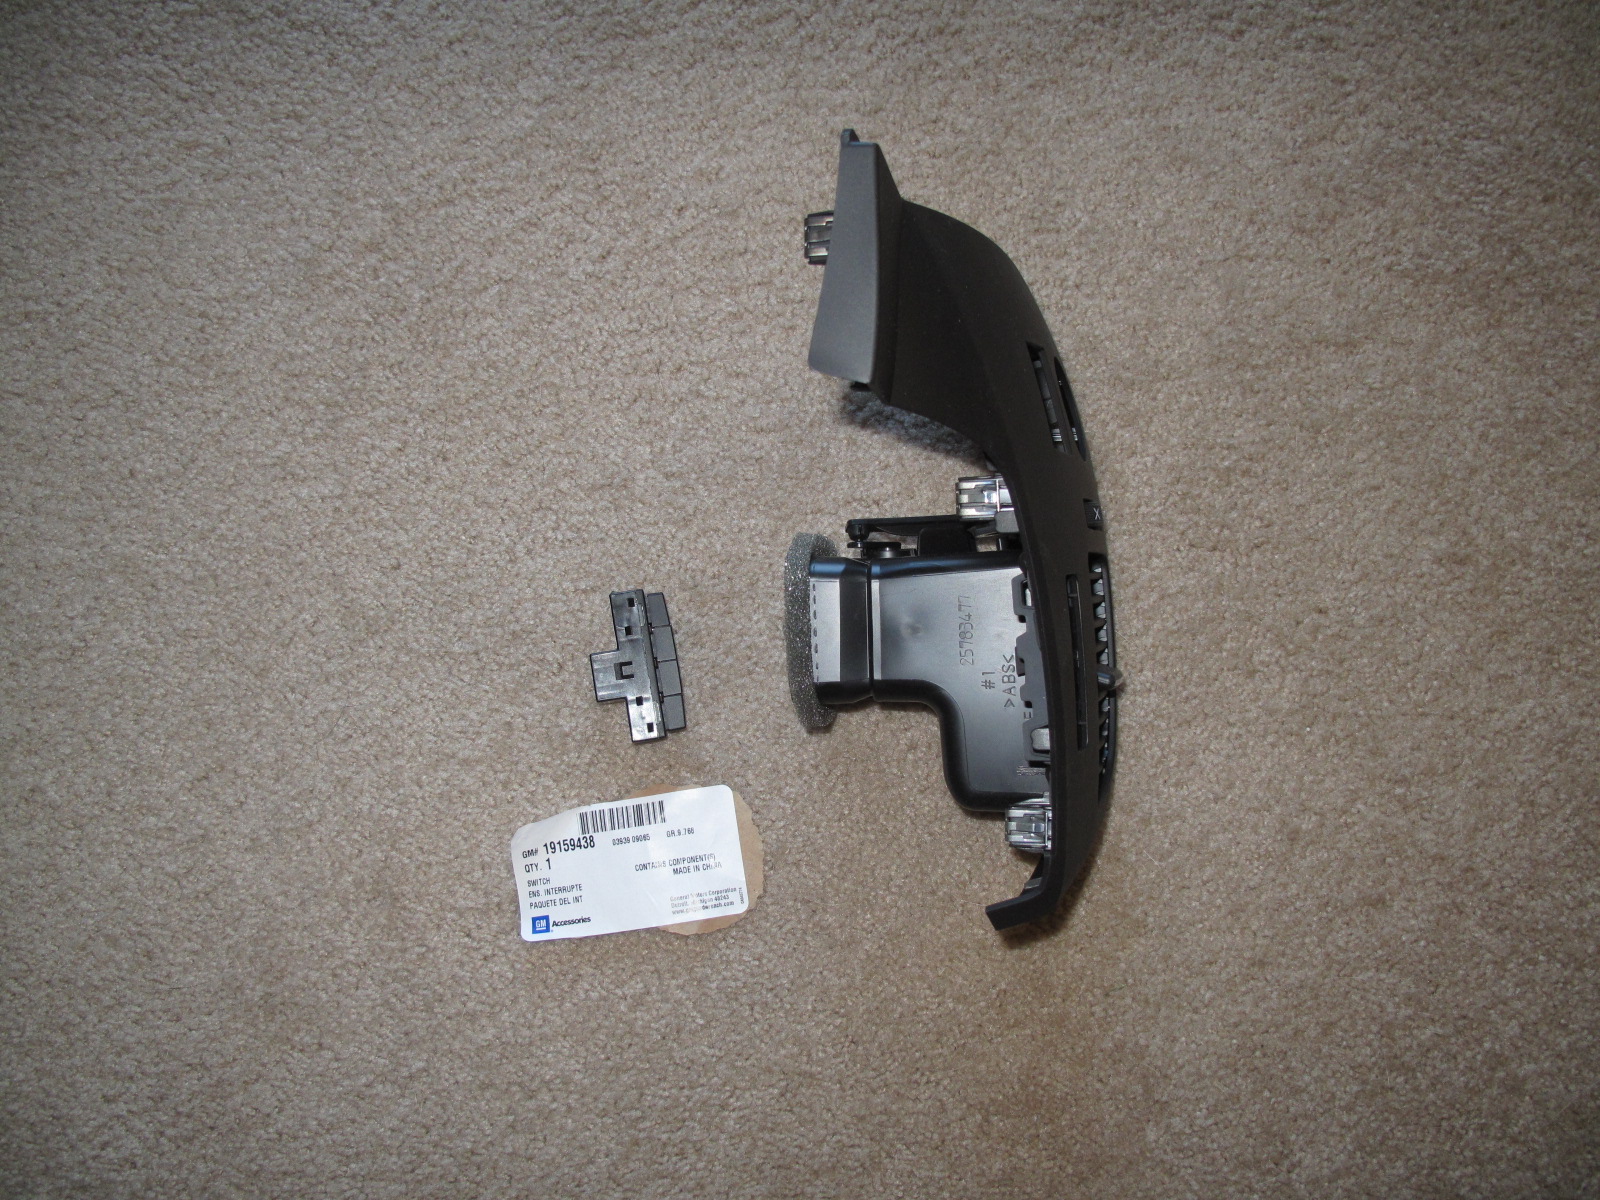
Back picture of the DIC buttons.

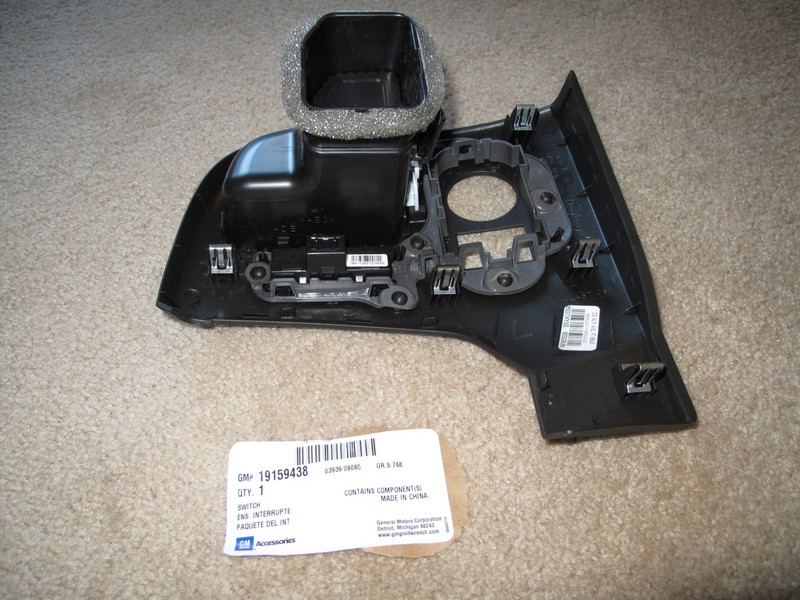
Front picture of the DIC buttons.
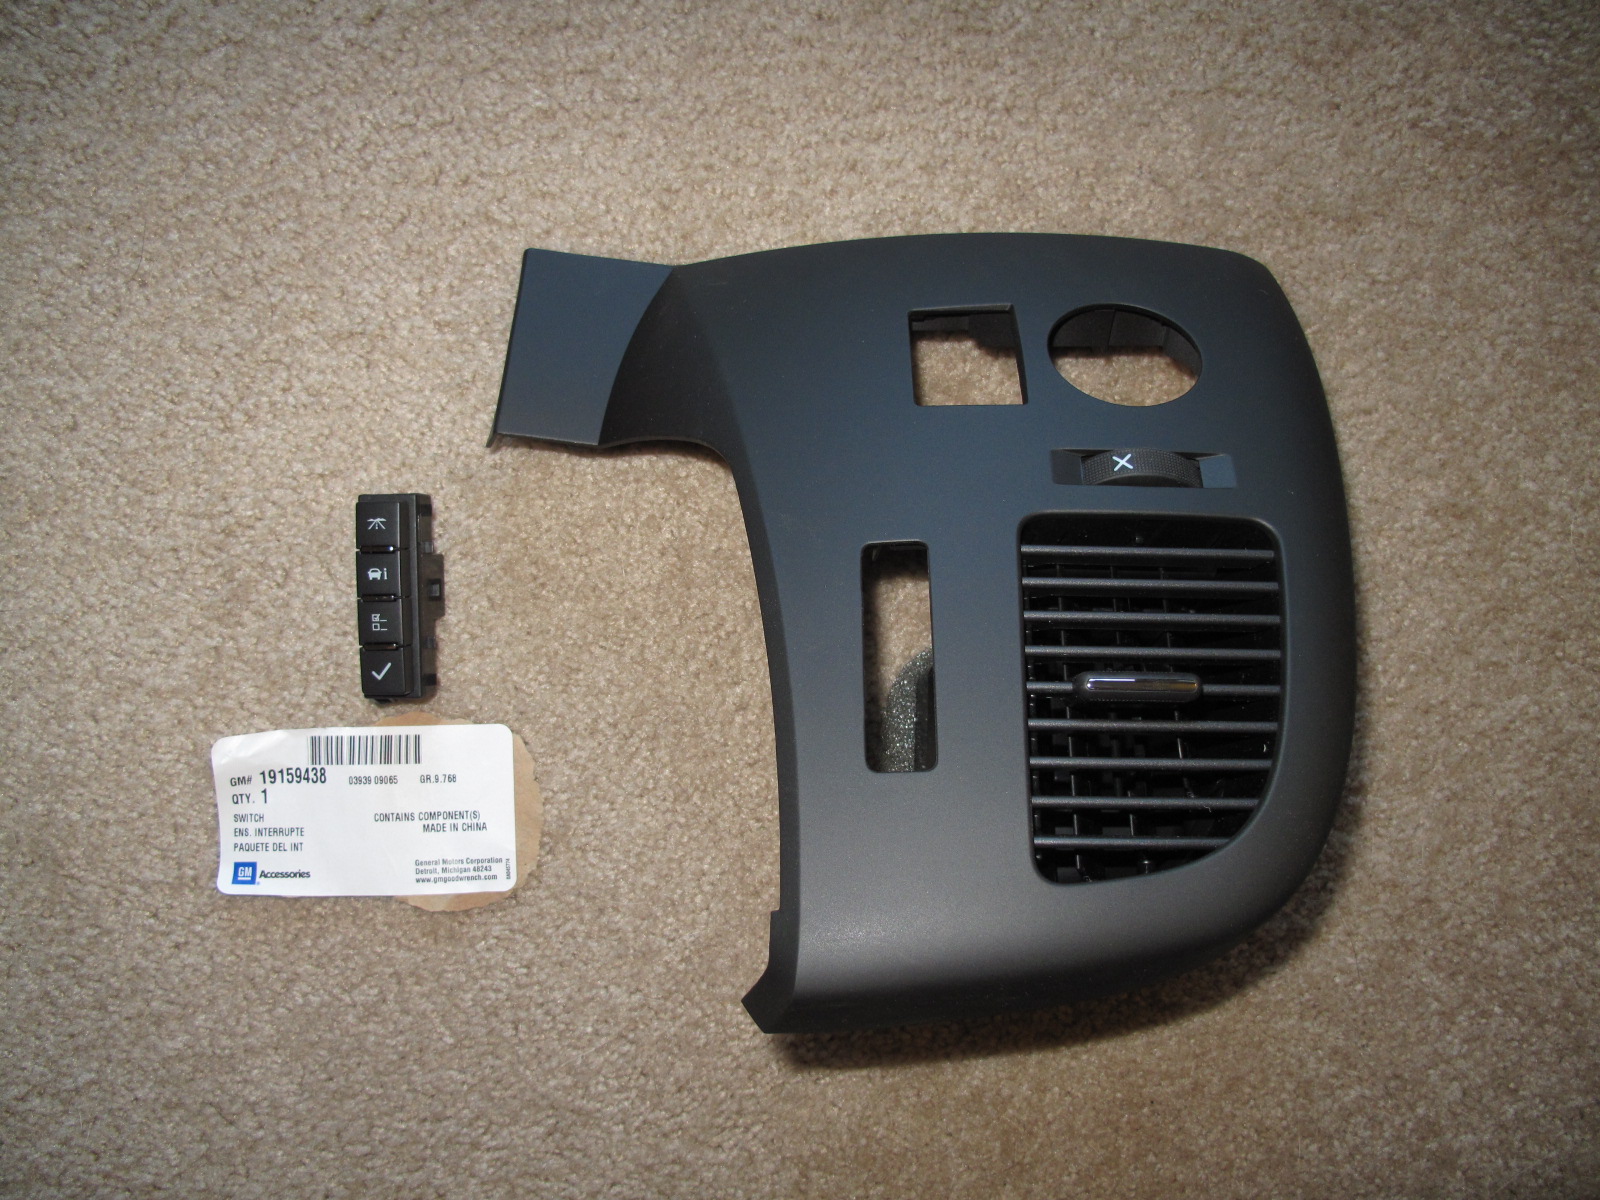
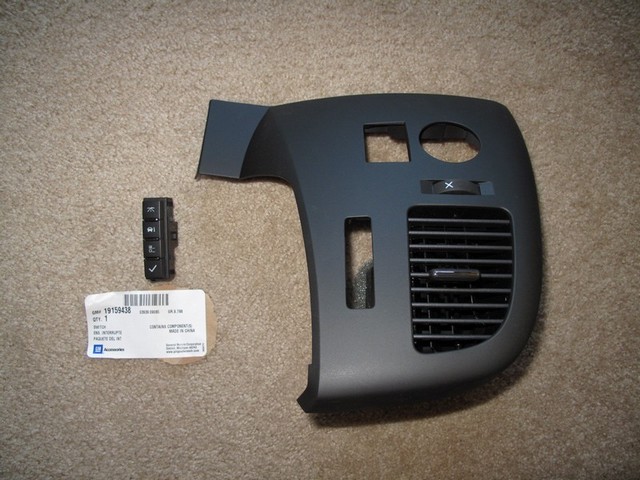
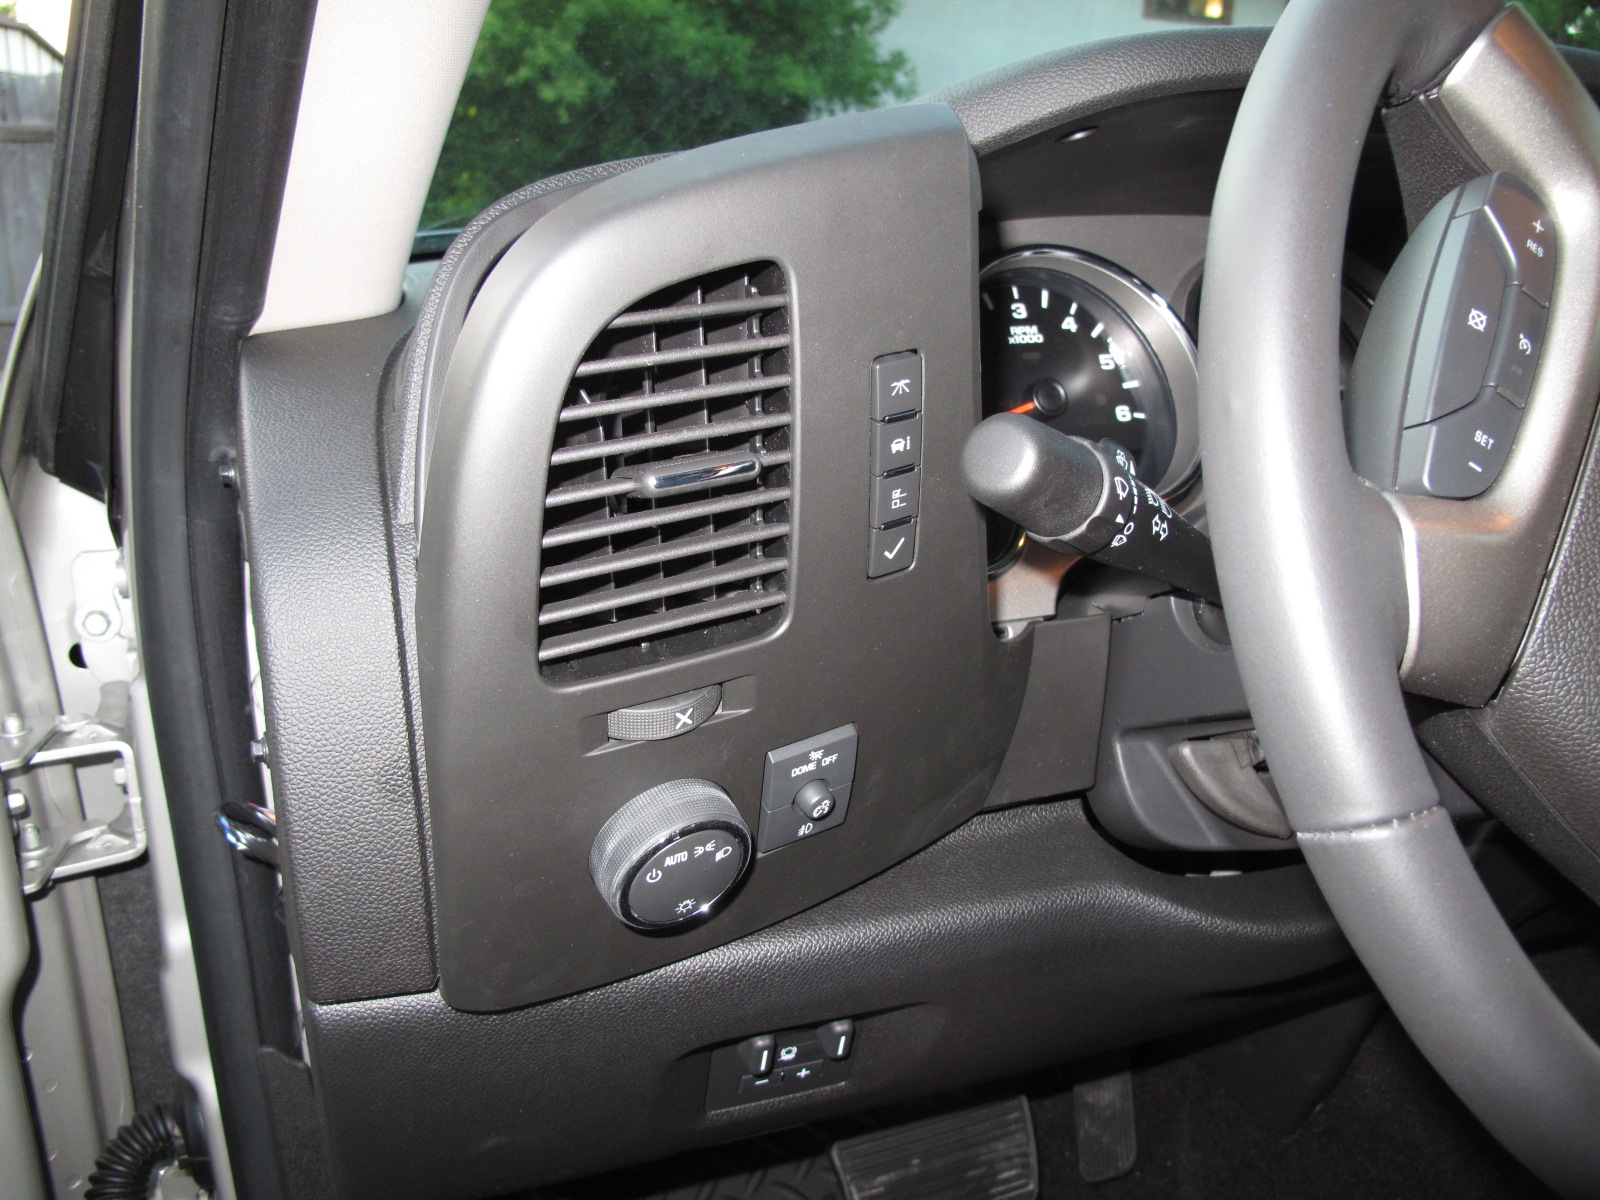
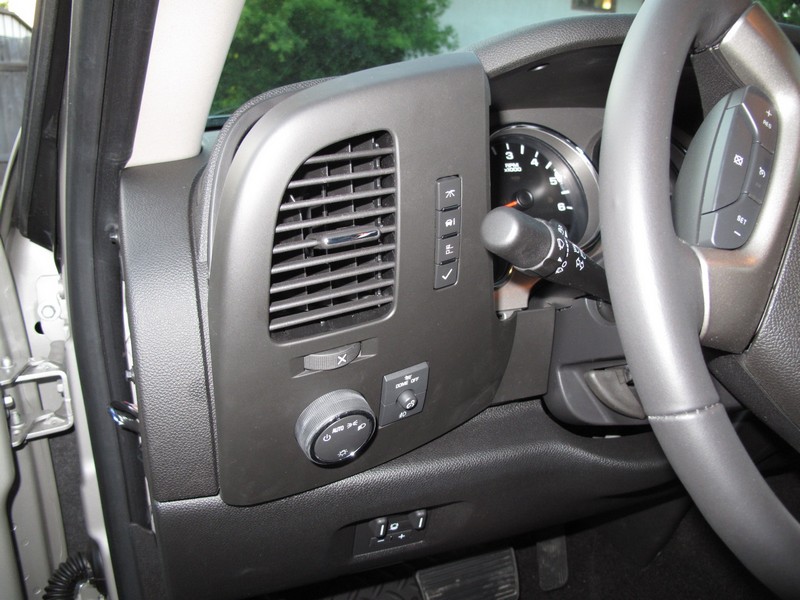
Front picture of the DIC buttons installed in the panel.

Other Driver Information Center Panel Pictures:
Back: 1600x1200
| 800x600
| 640x480
Right Side: 1600x1200
| 800x600
| 640x480
Front: 1600x1200
| 800x600
| 640x480
Top Back: 1600x1200
| 800x600
| 640x480
Bottom Back: 1600x1200
| 800x600
| 640x480
With buttons installed: 1600x1200
| 800x600
| 640x480
Installation
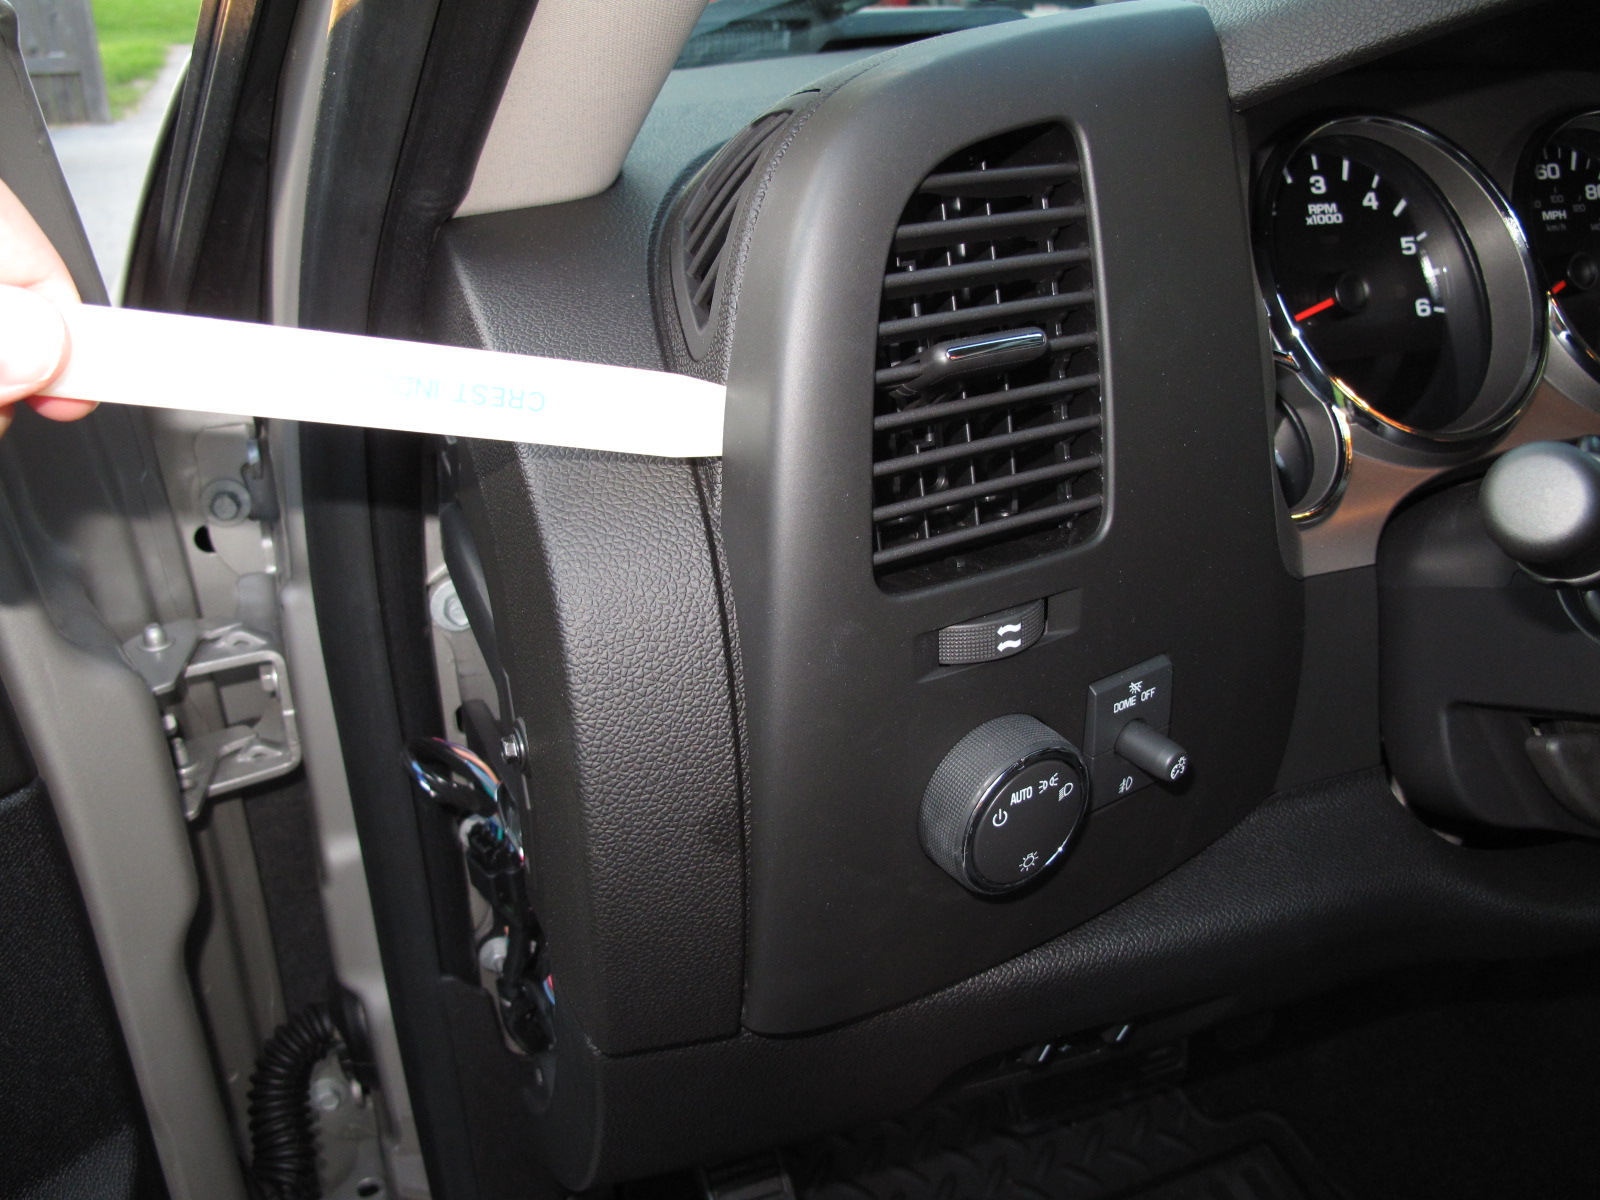
Start by moving the steering wheel out of the way.

- Either with strong finger nails or using a non-abrading tool (like a nylon pic) start pulling the left trim panel out until its clips have been pulled out of their sockets. You can use my other pictures as a reference for where the clips are located if you don't have a new panel available to you. You aren't going to break anything as long as you pay attention. There is only one spot that you need to be careful at this point and that is where the left trim panel contacts the piece of dash that goes over the instrument panel. The plastic dash pad is of a softer material than the trim piece you are trying to remove so it is prone to scratching.
- Work your way around the panel until you have gotten all the clips out of their sockets except for the ones closest to the steering column. Once you have done this you can now push towards the ground on the trim panel until you can pull the trim panel towards the rear of the vehicle. The vent in the trim panel fits inside a socket in the ducting.
- Now that you have gotten the vent out of its ductwork socket you can now pull the left trim piece slowly and carefully until remaining clips release. The one closest to the steering column is the most difficult as the dash wasn't meant to be disassembled this way.
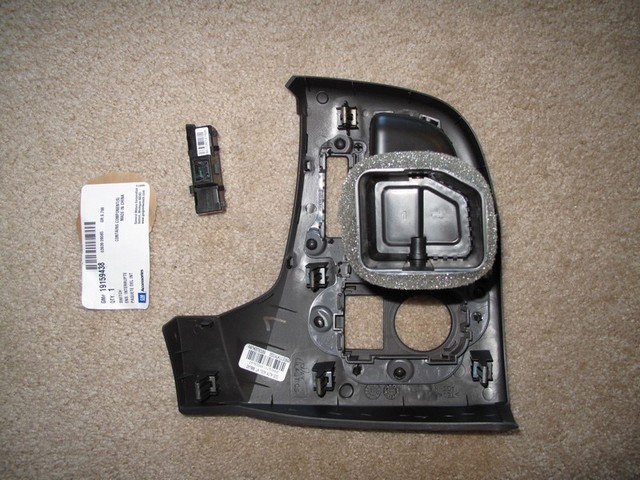
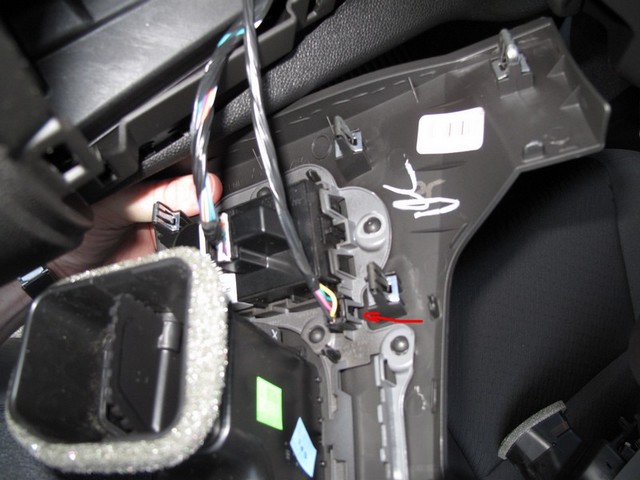
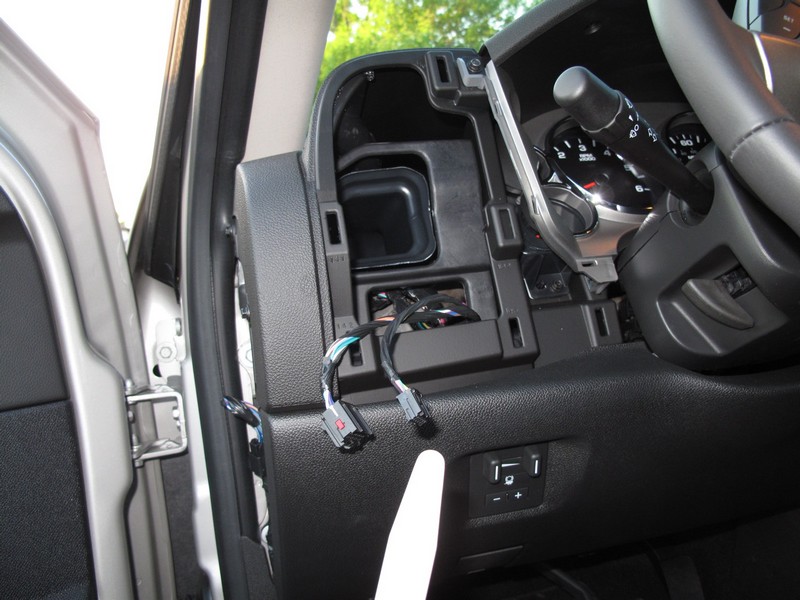
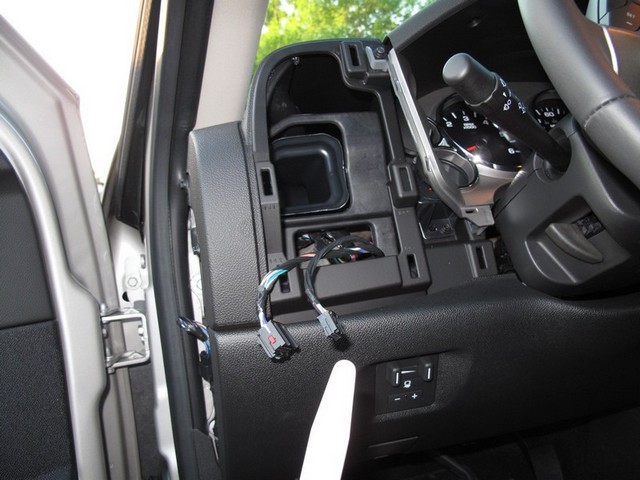
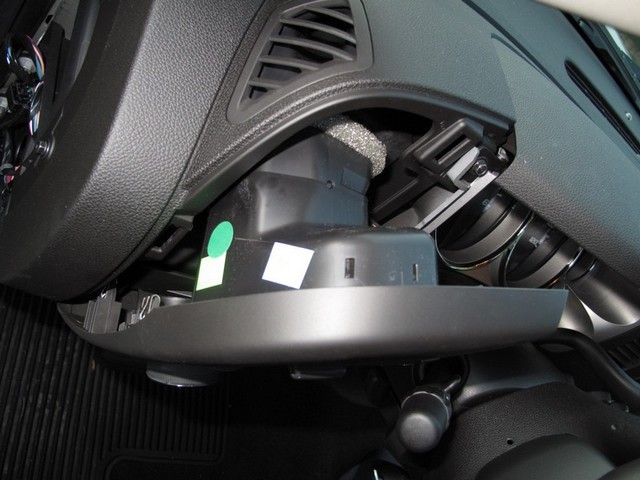
Now that the left trim panel is free you can unhook the
wiring. The DIC buttons plug into the harness the red arrow
is pointing at. If your truck doesn't have a harness plugged
into this socket then it is likely that your truck doesn't have the
ability to have the advanced driver information center.
Unplug the headlight switch also.

These are what the two sockets that go to the headlight switch
and the DIC buttons. I have heard of the DIC button harness being loose
in the dash so if your truck doesn't appear to have a DIC button
harness do some poking around in there.

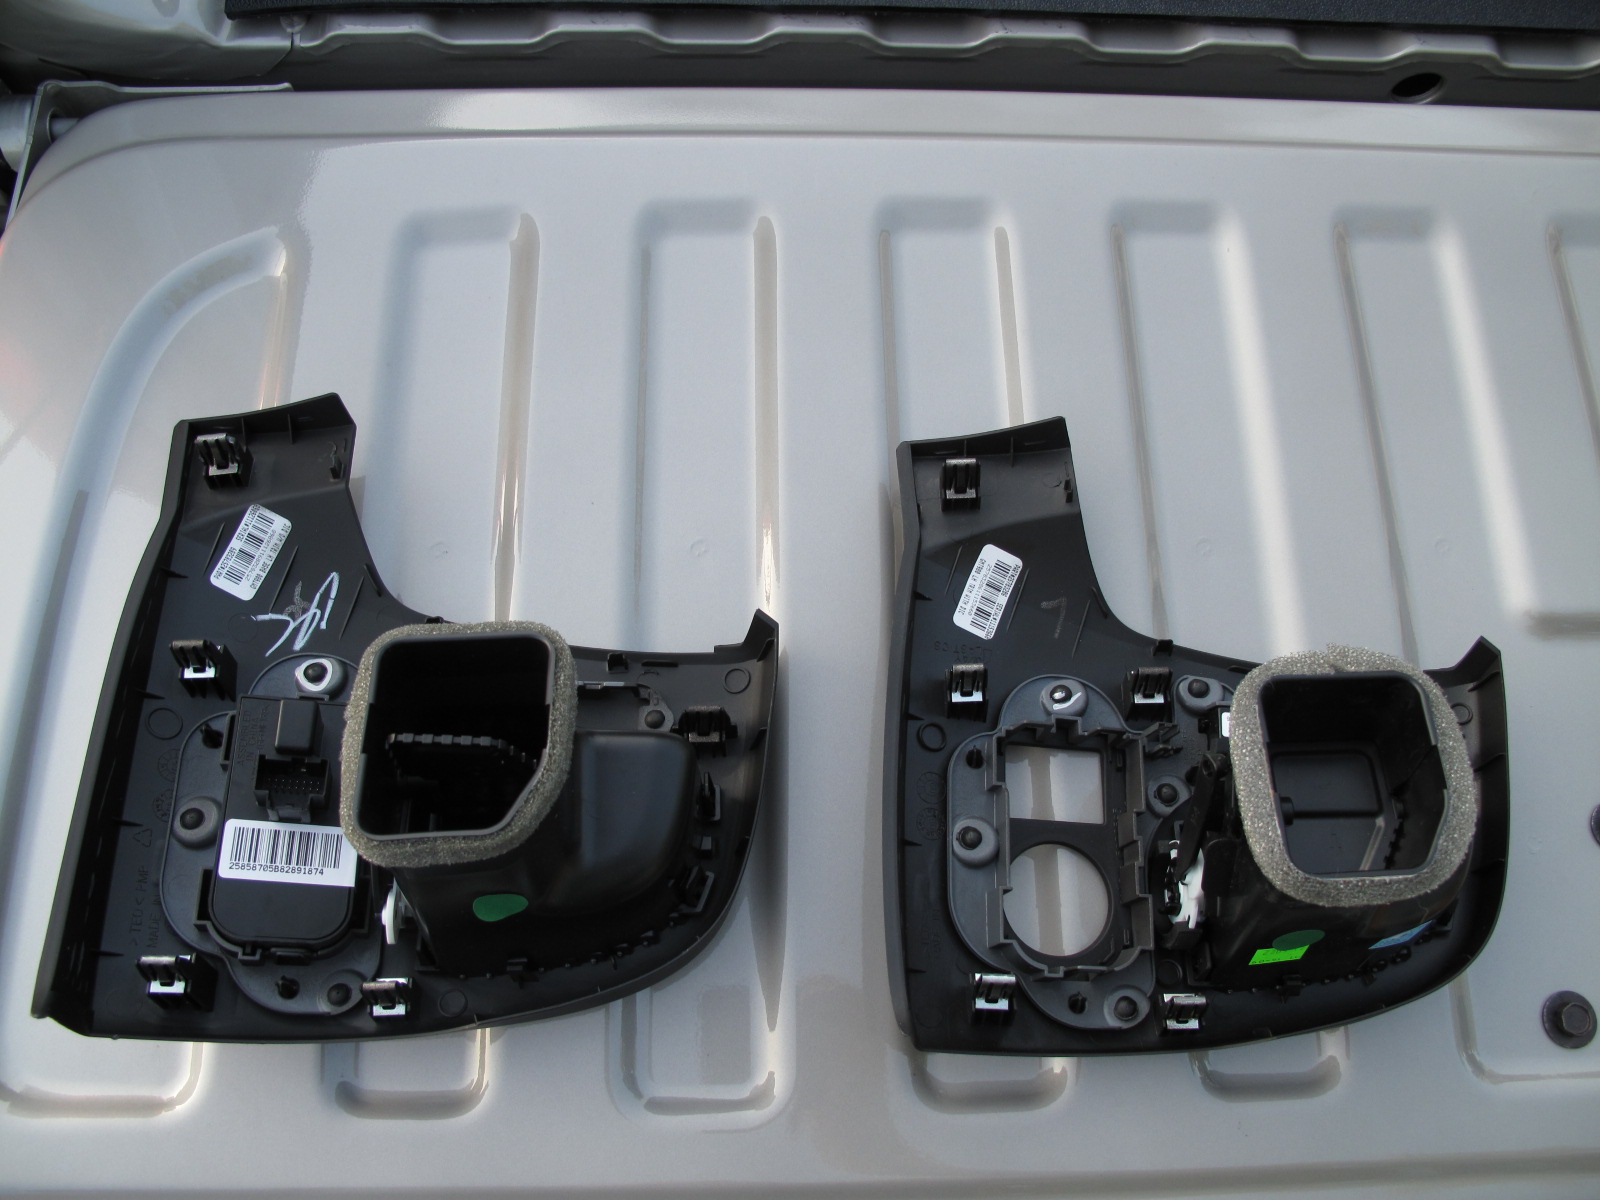
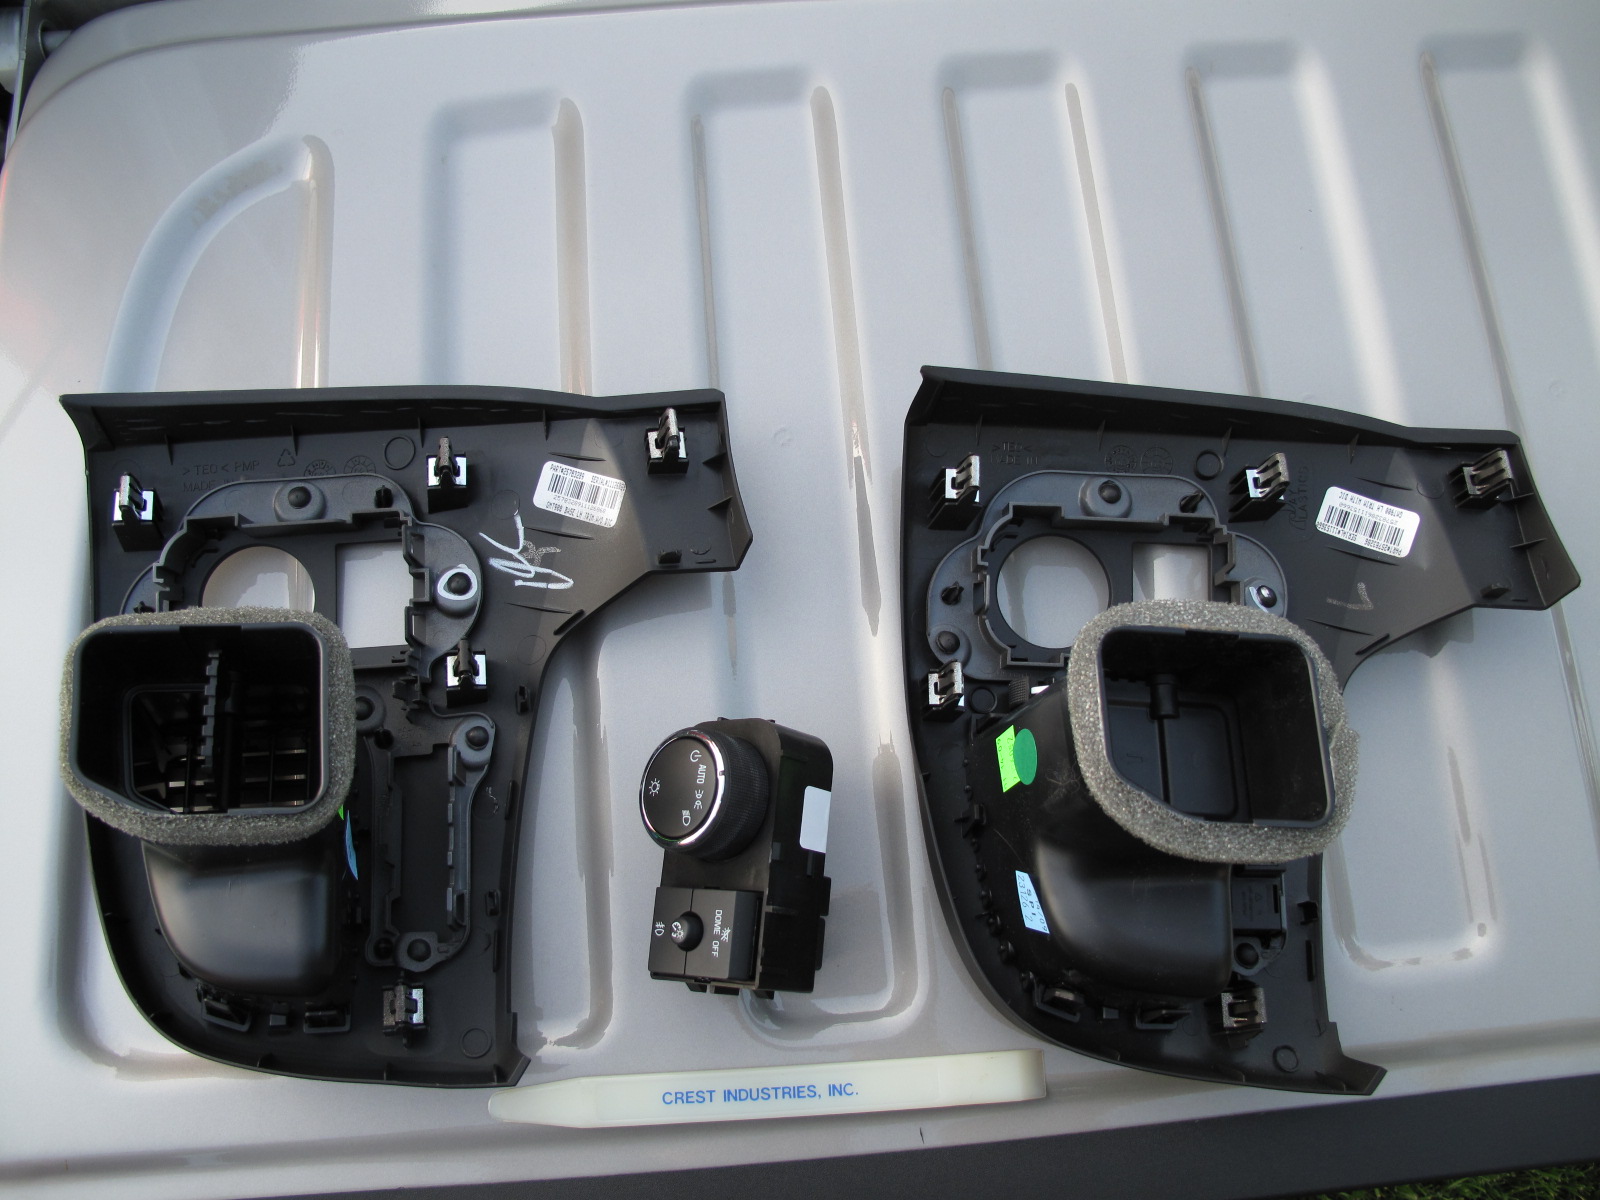
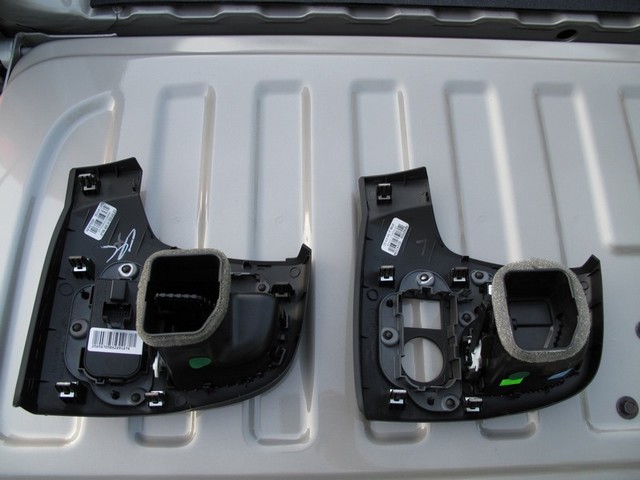
Old left trim panel (left) and new left trim panel with DIC
buttons (right).
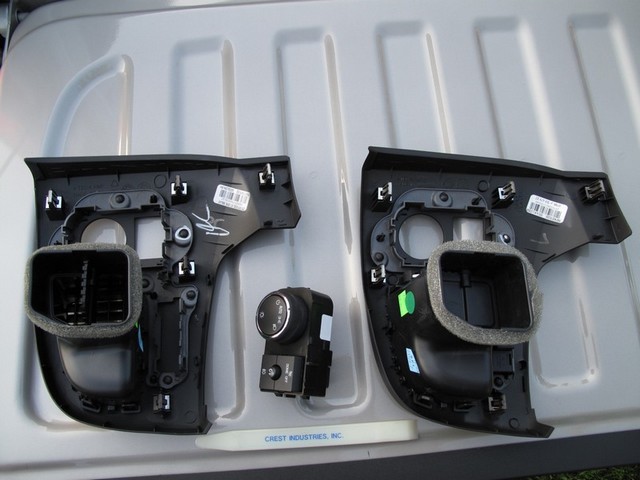
Remove the headlight switch from the old left trim panel
(left). It can be difficult to remove the headlight switch with only
two hands but if you got the panel out of the dash it's hard to admit
defeat at this point. Put the headlight switch in the new left trim
panel.
- Plug the connectors into their proper places and then start putting the left trim panel in the truck. Start with the lower part of the panel near the steering column. You need to make sure the locators are in the right spot so the panel goes in smoothly.
- Once those are lined up you can then push down on the panel again to get the vent into the ductwork socket.
Look to make sure that nothing is going to get pinched and
check to make sure that the clips are going to end up in their sockets.
You may have just enough room if you have smallish hands to
guide the vent into the ductwork socket.

Once everything is lined up you can gently push in on the
panel until all the clips are in their sockets. I suggest starting by
the steering column and paying careful attention to the dash above the
instrument panel so as not to scratch it.

Enjoy your Driver Information Center.
Driver Information Center Panel Installation Pictures:
Old panel: 1600x1200
| 800x600
| 640x480
Removing old panel: 1600x1200
| 800x600
| 640x480
Disconnecting wires from old panel: 1600x1200
| 800x600
| 640x480
What the wire connectors look like: 1600x1200
| 800x600
| 640x480
Comparing new and old panel: 1600x1200
| 800x600
| 640x480
Remove light switch and put it in the new panel: 1600x1200
| 800x600
| 640x480
Installing new panel: 1600x1200
| 800x600
| 640x480
Check to make sure everything is going in its proper place: 1600x1200
| 800x600
| 640x480
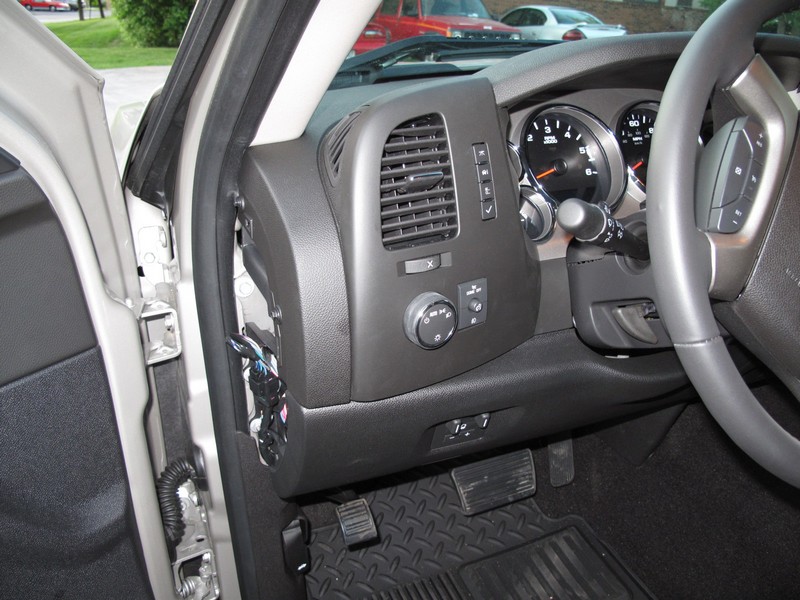
Installed: 1600x1200
| 800x600
| 640x480